This is the 5th and final part of a multi-part series. View the rest:
- Part 1: Plans and Materials
- Part 2: Racetrack
- Part 3: Vertical Skirt
- Part 4: Subtable and Playing Surface
- Part 5: Finishing It Up
Sanding
Here’s where you’ll spend a lot of time. Give a good sanding with a medium grit sandpaper to the entire table. You can use a power sander if you’d like. I did the more detailed areas, like the moulding around the vertical skirt, by hand.
Filling
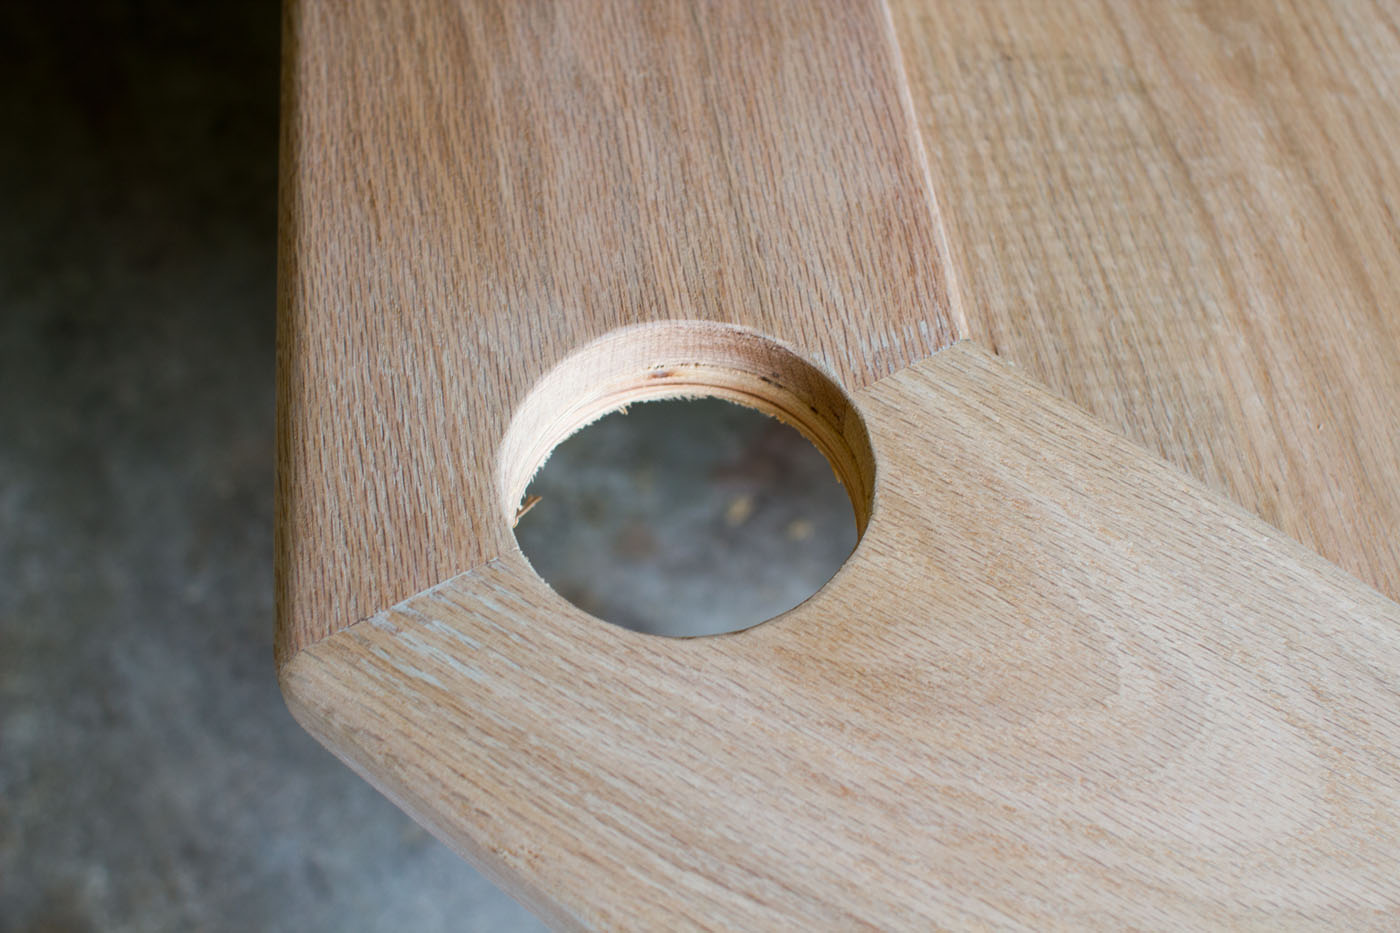
Once you’ve given a rough sanding to the whole thing, take a good look at every joint and see if any of them need any wood filler. I mentioned wood filler in section 3 while building the vertical skirt, and that’s where I ended up using a lot of filler (more than I had hoped).
Another place I used wood filler was on the main racetrack, between each of the 8 pieces of the octagon. Since my angled joints weren’t 100% snug, I tidied them up a bit with the filler.
Pro Tip: The trick with wood filler is to get a lot right where you need it, but try not to have too much spillover. I’ve noticed that oak (which is what I typically use) tends to have a fairly deep grain. When wood filler gets in there, it’s a bit difficult to sand it all out, since the grain is so deep. This might not be as much of a problem with other woods, but having to sand out a huge chunk of your surface just to get all the wood filler off is never good.
Sanding (again)
Once you’ve filled all your problem spots, allow them to dry according to the package instructions. You may have to re-fill some deep holes a few times, since filler has a tendency to shrink and settle as it dries.
Now it’s time to break out the sandpaper again.
Pro Tip: Don’t use a power sander on wood filler. Trust me on this one.
At this point, you can probably use a medium grit again, then do another round of sanding with a fine grit sandpaper. I tend to stop at this point, since the polyurethane coats will even out any small imperfections on the surface.
Staining
It’s really important that the surface of the table is clean before you start staining. We’re talking super clean here. The best way to do this is to vacuum as much of the dust off the surface and then use a tack cloth to pick up the rest. Tack cloths are sticky pieces of gauze-like material that are specifically made for this.
Some people swear by different brands of stain, but I’ve always had pretty good results with Minwax’s Wood Finish, which is an oil-based interior stain.
Pro Tip: It’s best to use a separate stain and polyurethane, not a product that claims to “stain and seal” at the same time (I’m looking at you PolyShades). You’ll get much better results and have a lot more control over the color.
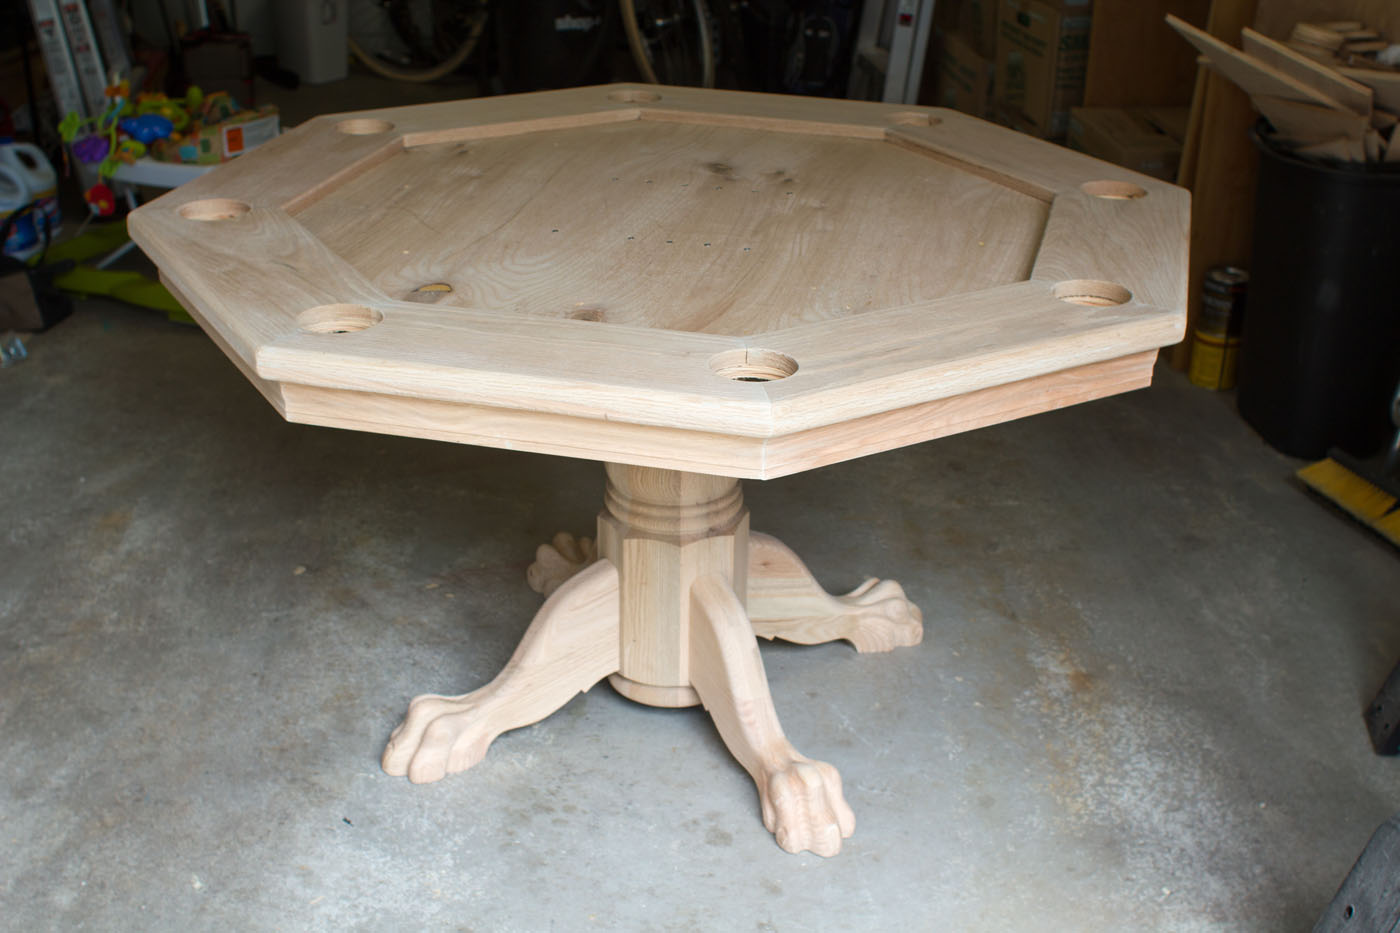
This is the table, put together right before staining. I dry fit it like this to make sure everything fit well and looked good, then disassembled it for staining. Each piece (table top, pedestal, and legs) was stained individually.
The best way I’ve found to apply stain is to take a brush or rag and flood the surface of the wood with color. Don’t worry if your stain pools here and there. I also tend to start with the bottom and try not to let any drips form on the edges so they don’t show when the table is upright.
I usually wait about 10 minutes and then take a clean rag (or rags in this case) to wipe off all the excess stain that hasn’t been absorbed by the wood. What you’re left with is a fairly accurate idea of what the final color will be.
Pro Tip: While the stain coat is still fresh, do a really thorough inspection of the surface to make sure there aren’t any spots that were missed or where the stain didn’t take. This can be due to excess wood filler or just imperfections in the wood. To resolve small spots like this, take a fine grit sandpaper (something like 220 or 320) and dip it in a little bit of stain. Then, very gently, work the stain into the blemish with the sandpaper. The rough surface should give the stain something to adhere to. Wipe off the excess with your rag.
After a good drying (refer to the manufacturer’s label), it’s time for another coat of stain, if you want to deepen the color, or you can go straight to your clear coat.
Polyurethane
I like to use polyurethane more than polycrylic. I think it gets smoother and lasts longer. I usually apply 3 coats at a minimum. To prepare, stir the polyurethane gently. Do not shake it. Polyurethane looks crappy if there are a lot of air bubbles trapped in it, so shaking is a no-no. The finishing process goes something like:
- Remove debris and wipe surface with a tack cloth.
- Apply polyurethane with a clean brush, specifically made for finishing. (There are plenty of resources on the web for proper stroke technique, but the goal here is to go smooth and slow so you’re not creating a lot of air bubbles)
- After the surface is completely dry, do a light sanding with 400-grit or higher sandpaper.
- Repeat until satisfied with surface smoothness.
Polyurethane can take a while to “cure”. After 24-48 hours, you can use the table for light use, but I wouldn’t put it through its paces for a few more days. Also, it’ll take a few days for the fumes to become a little less noticeable, so if you can keep the table in a garage or sealed basement until then, you’ll do yourself a favor.
Once the poly coats are dry, you can connect the felt portion, and the pedestal and legs. If everything went well, you should end up with something close to this.
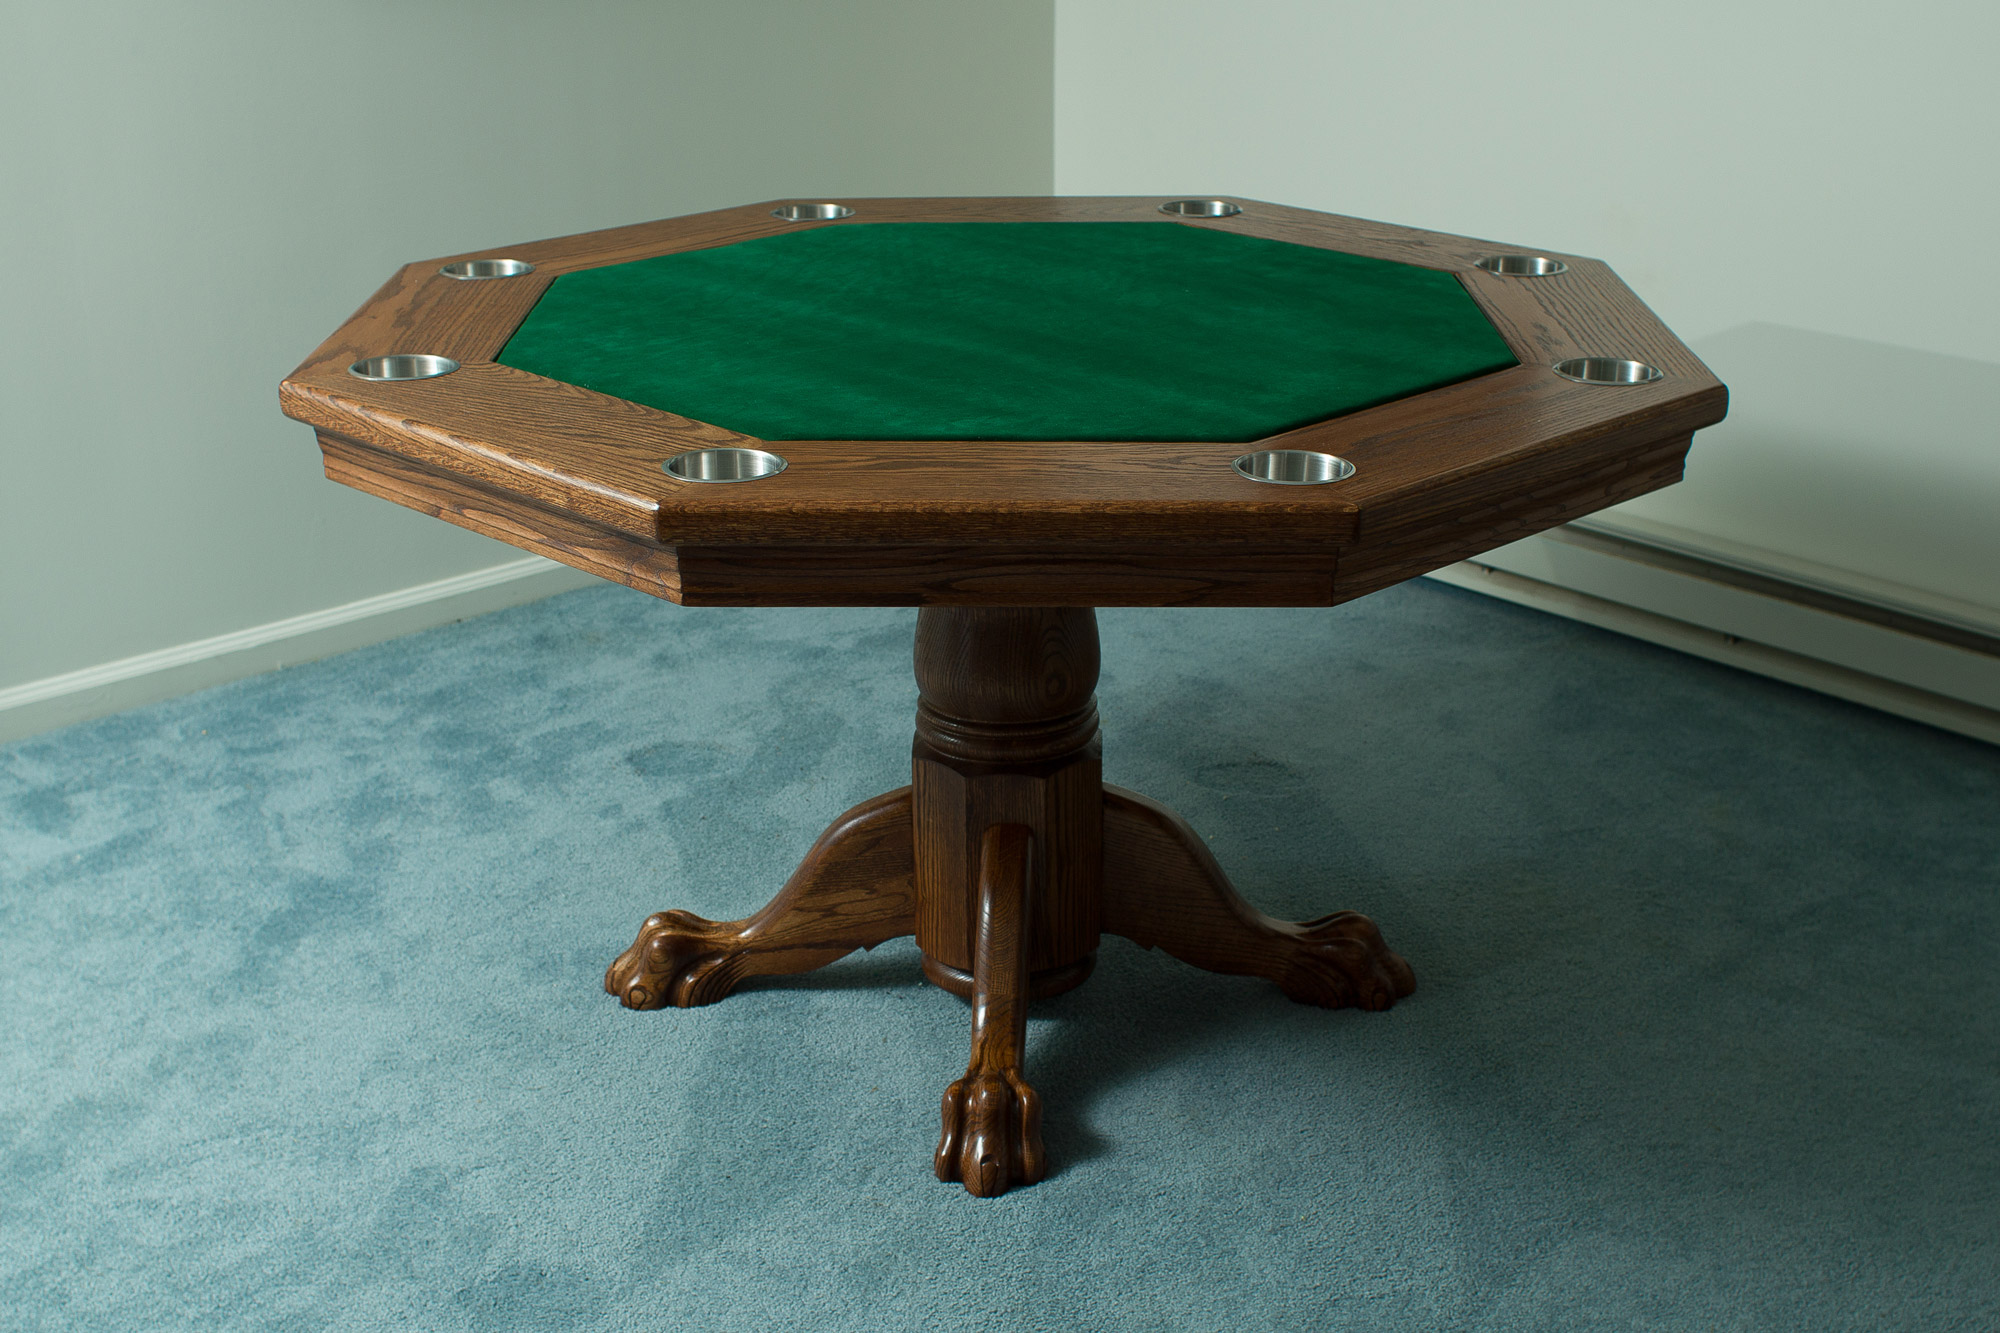
Some people like having chip trays on the racetrack portion, but I prefer a solid surface to stack chips so I went with the flat racetrack as shown. The great thing about projects like this is you can customize to your own preferences to really make it your own.
Until the next project!